Getting Started with MVTec HALCON
Preparing for Use
Before you use your camera, we recommend that you are aware of the following resources available from the Downloads page:
Getting Started Manual for the camera—provides information on installing components and software needed to run the camera.
Technical Reference for the camera—provides information on the camera’s specifications, features and operations, as well as imaging and acquisition controls.
Firmware updates—ensure you are using the most up-to-date firmware for the camera to take advantage of improvements and fixes.
Installation and Configuration
The steps for installing and setting up MVTec HALCON depend which interface your camera uses.
FireWire Cameras |
GigE Vision Cameras |
USB3 Vision Cameras |
USB2 Cameras |
|
1. Install MVTec HALCON. |
1. Install MVTec HALCON. |
1. Install MVTec HALCON. |
To use a USB2 camera with MVTec HALCON, you must use FLIR’s C# wrapper to generate a HalconImage. Contact Support to obtain this example. |
|
2. Connect the camera to the PC. |
2. Connect the camera to the PC. |
2. Connect the camera to the PC. |
|
|
3. Install the FireWire driver. |
3. Start HDevlop and detect the camera. |
3. Start HDevlop and detect the camera. |
|
|
4. Start HDevlop and detect the camera. |
4. Verify the camera is configured. |
4. Verify the camera is configured. |
|
|
5. Verify the camera is configured. |
5. Capture images. |
5. Capture images.
|
|
|
6. Capture images. |
The following sections provide more detail.
Step 1—Install MVTec HALCON
The examples used in this document are from MVTec HALCON v11. It is available for download from the MVTec HALCON website. You must be a registered user to download the software.
Follow the installation instructions.
Step 2—Connect the Camera to the PC
Connect the camera to the PC. For information, see the camera’s Getting Started Manual
Step 3—Install FireWire Driver (FireWire cameras only)
For FireWire cameras, the third-party IIDC 1394 FirePackage driver must be installed. It is available from the MVTec HALCON downloads website. You must be a registered user to download the driver.
To install the FireWire driver:
- Download and install FirePackage.
- From the Start Menu run InstallDriver.
Start→All Programs→FirePackage2v35→InstallDriver.exe
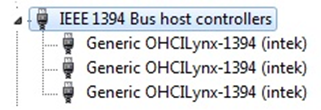
- Using Device Manager, verify the driver is installed. The FireWire host controller should appear as “Generic OHCILynx-1394 (Intek)”.
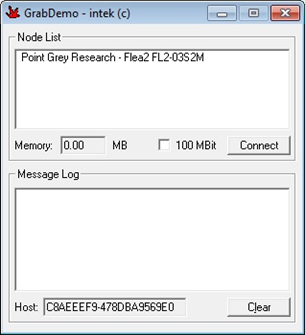
- From the Start Menu run GrabDemo to ensure the camera is properly enumerated.
Start→All Programs→FirePackage2v35→GrabDemo.exe
Step 4—Start HDevelop and Detect the Camera
To start HDevelop:
- Launch the HDevelop application.
Start Menu→All Programs→MVTec HALCON 11→HDevelop
- In HDevelop click the Assistants button, then click Open New Image Acquisition. The Image Acquisition window opens.
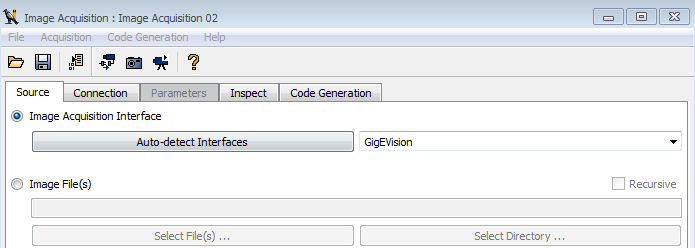
- Click on Auto-detect Interfaces.
- If multiple cameras using different interfaces are connected, it is possible that HALCON will not auto select the desired camera interface. In this case, manually select the camera interface from the drop-down list.
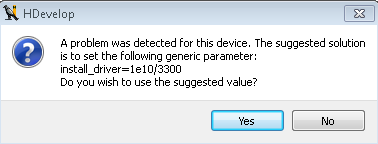
- If your camera driver is not installed properly, a warning message appears. Click Yes and the driver is automatically installed when you press “Connect” in step 5 below.
Step 5—Verify Camera is Configured Properly
To verify your configuration:
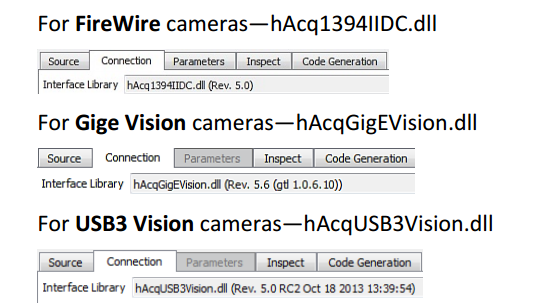
- In the Image Acquisition window, on the Connection tab view the interface library.
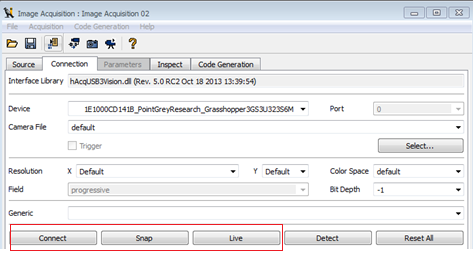
- Click Connect to verify the camera’s configuration. If you received a driver warning in step 4 above, the driver is installed at this time.
Step 6—Capture Images
To capture images:
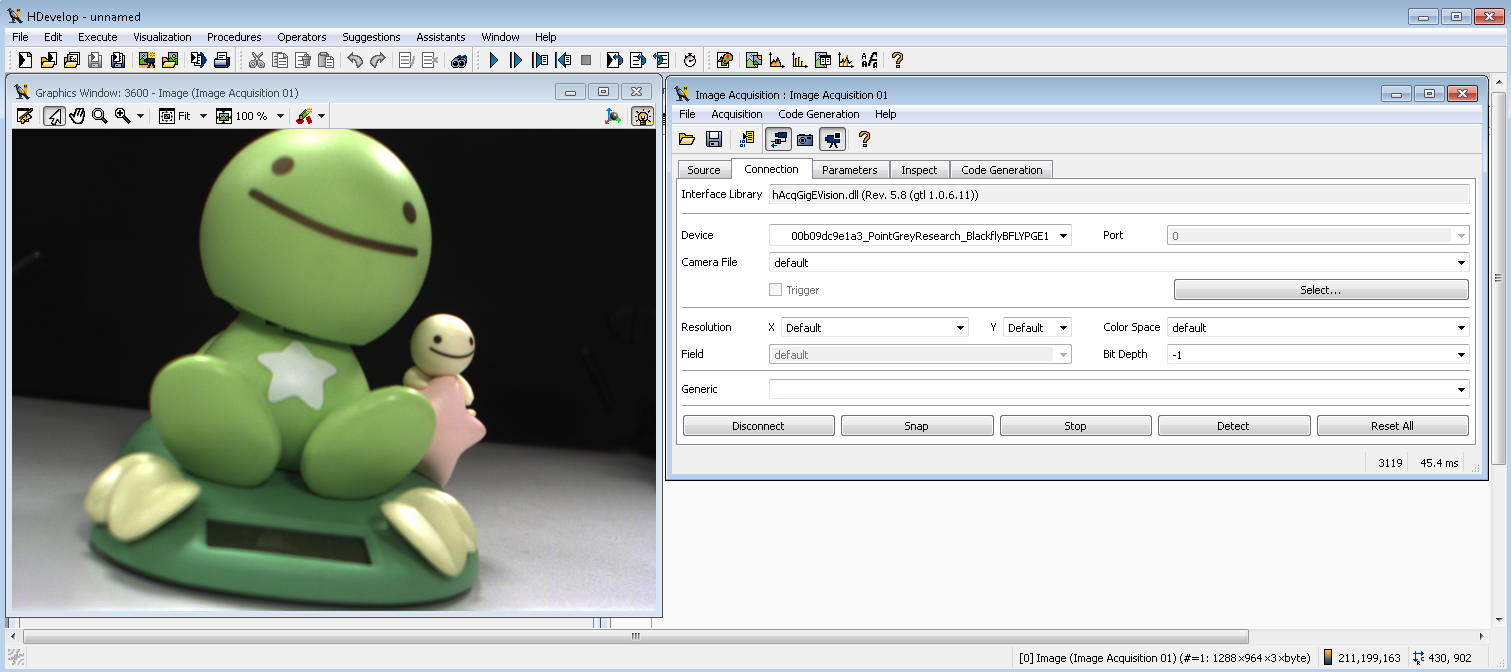
- In the Image Acquisition window, click Snap to capture a single image. Click Live to capture continuous images.
|
If your GigE Vision camera cannot stream, verify the filter driver. See the Troubleshooting section below. |

Troubleshooting Tips
The following suggestions may help you troubleshoot issues with your camera:
- Update the driver to the latest version.
- Update the firmware to the latest version.
- Update the software to the latest version.
- Perform a soft reboot and if still necessary a hard reboot of the PC.
- Disable then enable the driver.
- Power cycle the camera.
- Power the camera through GPIO, if wiring harness is available.
- Use a separate host controller instead of an integrated one, if available.
- Ensure the card is powered via the 4-pin hard drive connector, if applicable.
- Use a different cable or host controller or PC.
GigE Vision Cameras
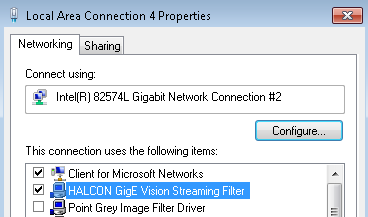
For streaming GigE Vision cameras, the HALCON GigE Vision Streaming Filter is required. If you cannot stream in HDevelop, verify your driver installation.
To verify your driver:
- Open the Local Area Connection that is connected to the camera and ensure “HALCON GigE Vision Streaming Filter is selected.
- If it is not installed, click the Install button.
- Click Service, then click Have Disk.
- For 64-bit systems—
C:\Program Files\MVTec\HALCON-11.0\misc\drivers\win_xp_64 \hgevstrm_m.inf - For 32-bit systems—
C:\Program Files\MVTec\HALCON-11.0\misc\drivers\win_xp_32 \hgevstrm_m.inf
Artículos relacionados
-
 Comunicado de prensa
FLIR Launches Industry-First High-Definition Handheld Cooled Optical Gas Imaging Camera for Oil and Gas Inspection Professionals
Lea la historia -
 Noticias sobre los productos
Boston Whaler and Mercury Marine are Marine Industry’s First to Demonstrate Raymarine DockSense for Outboard Propulsion
Lea la historia -
 Comunicado de prensa
FLIR Launches Second Generation Thermal Camera for Self-Driving Cars
Lea la historia